
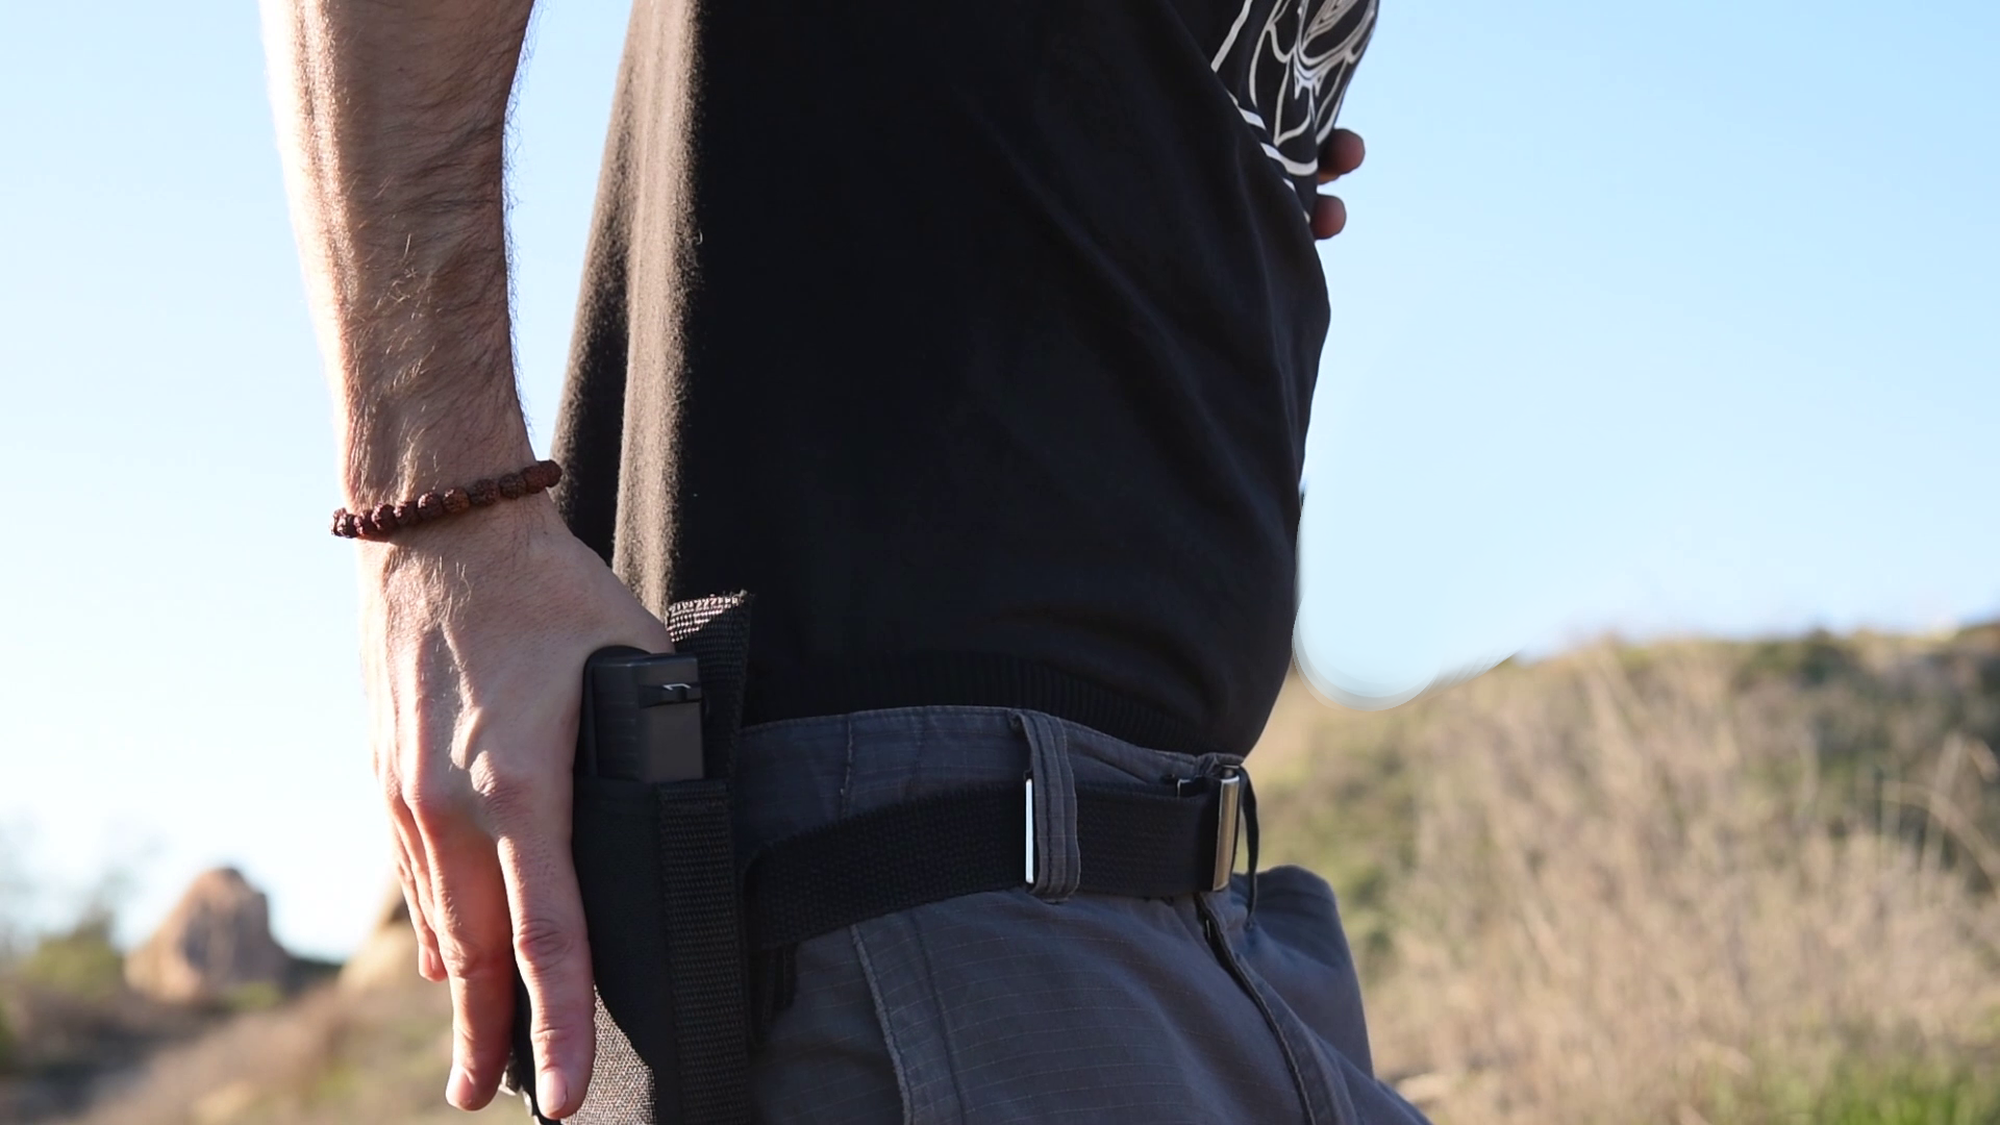
01 Left Hand on Lower Left Ribs Right Hand Gripping Weapon with Thumb and Straight Fingers
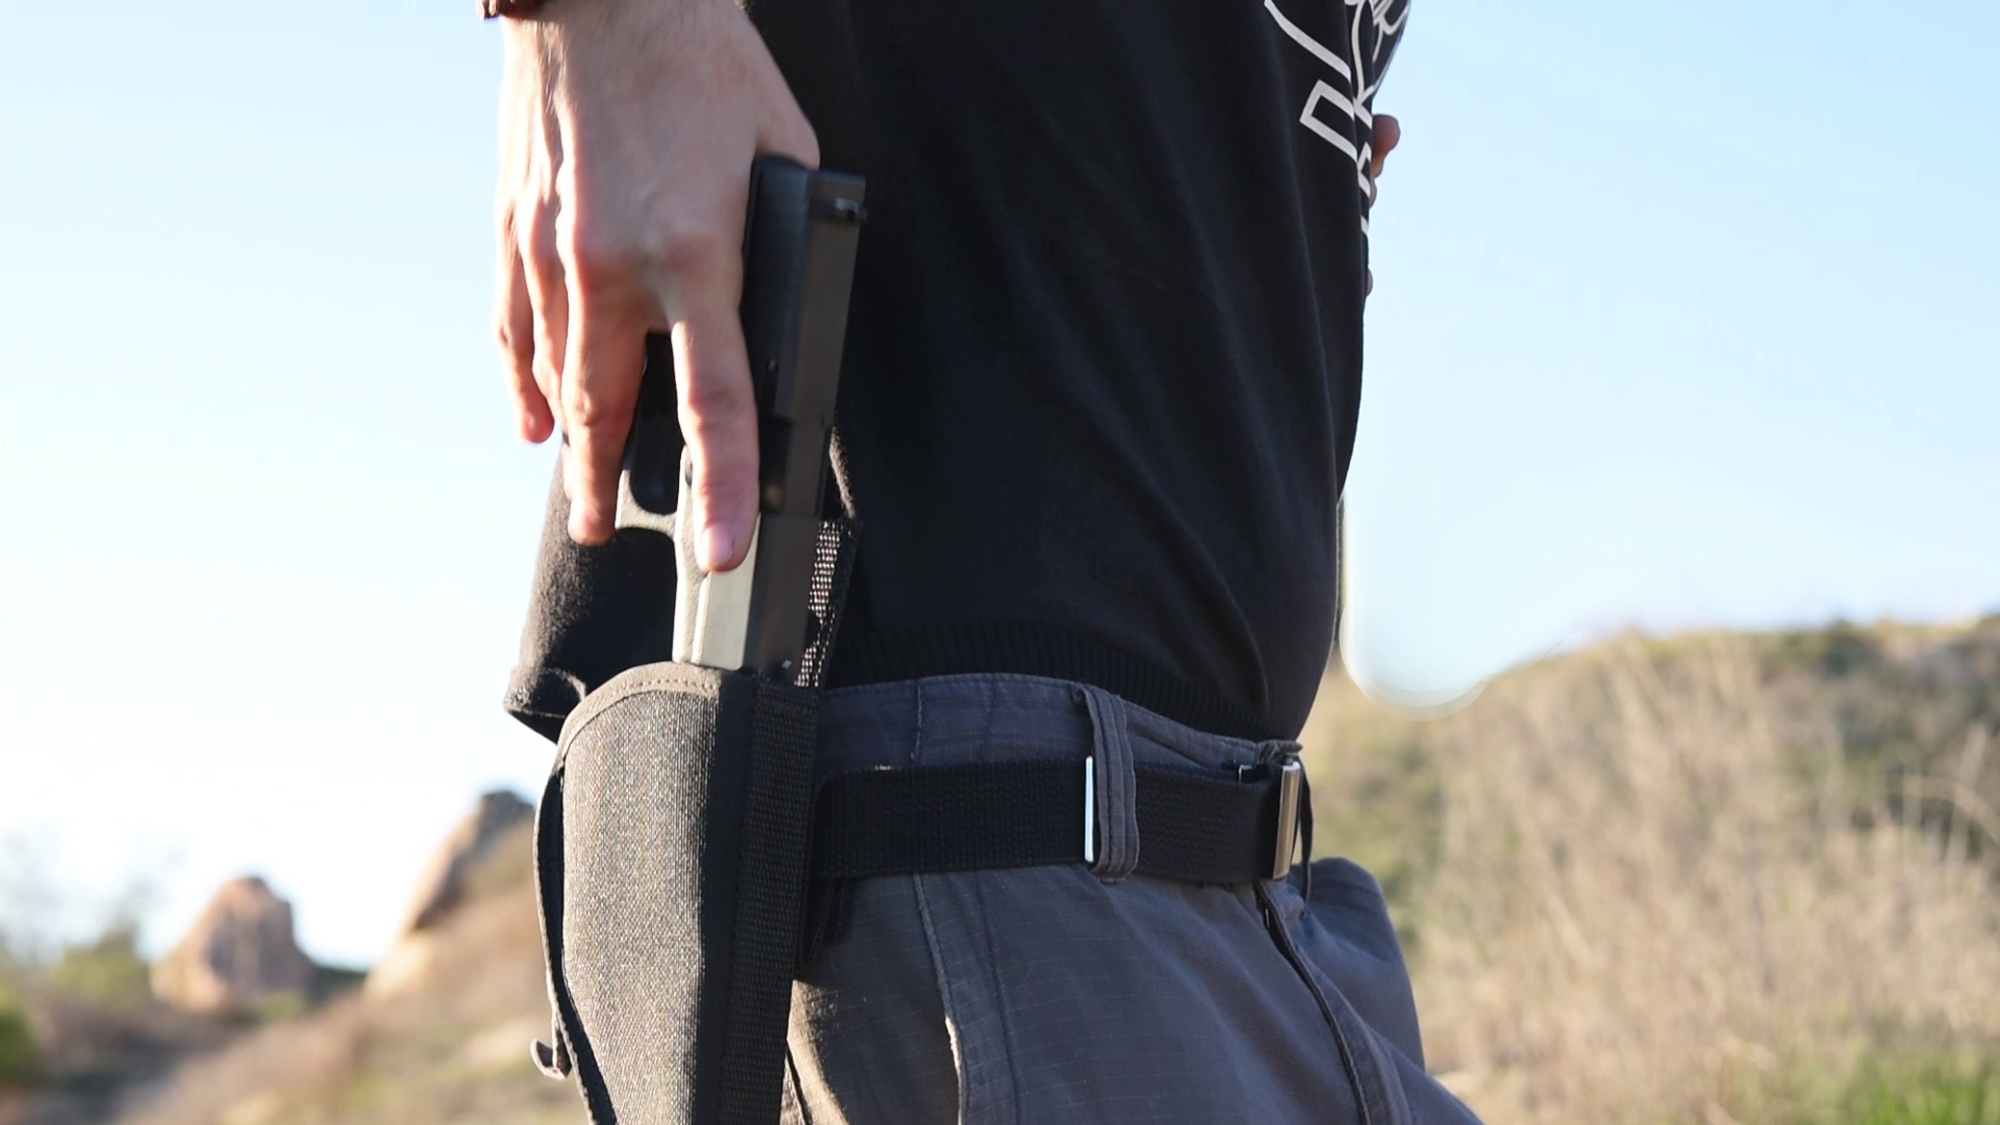
02 Drawing Weapon From Holster With Index Finger Outside of Trigger Guard 01
03 Drawing Weapon From Holster With Index Finger Outside of Trigger Guard 02
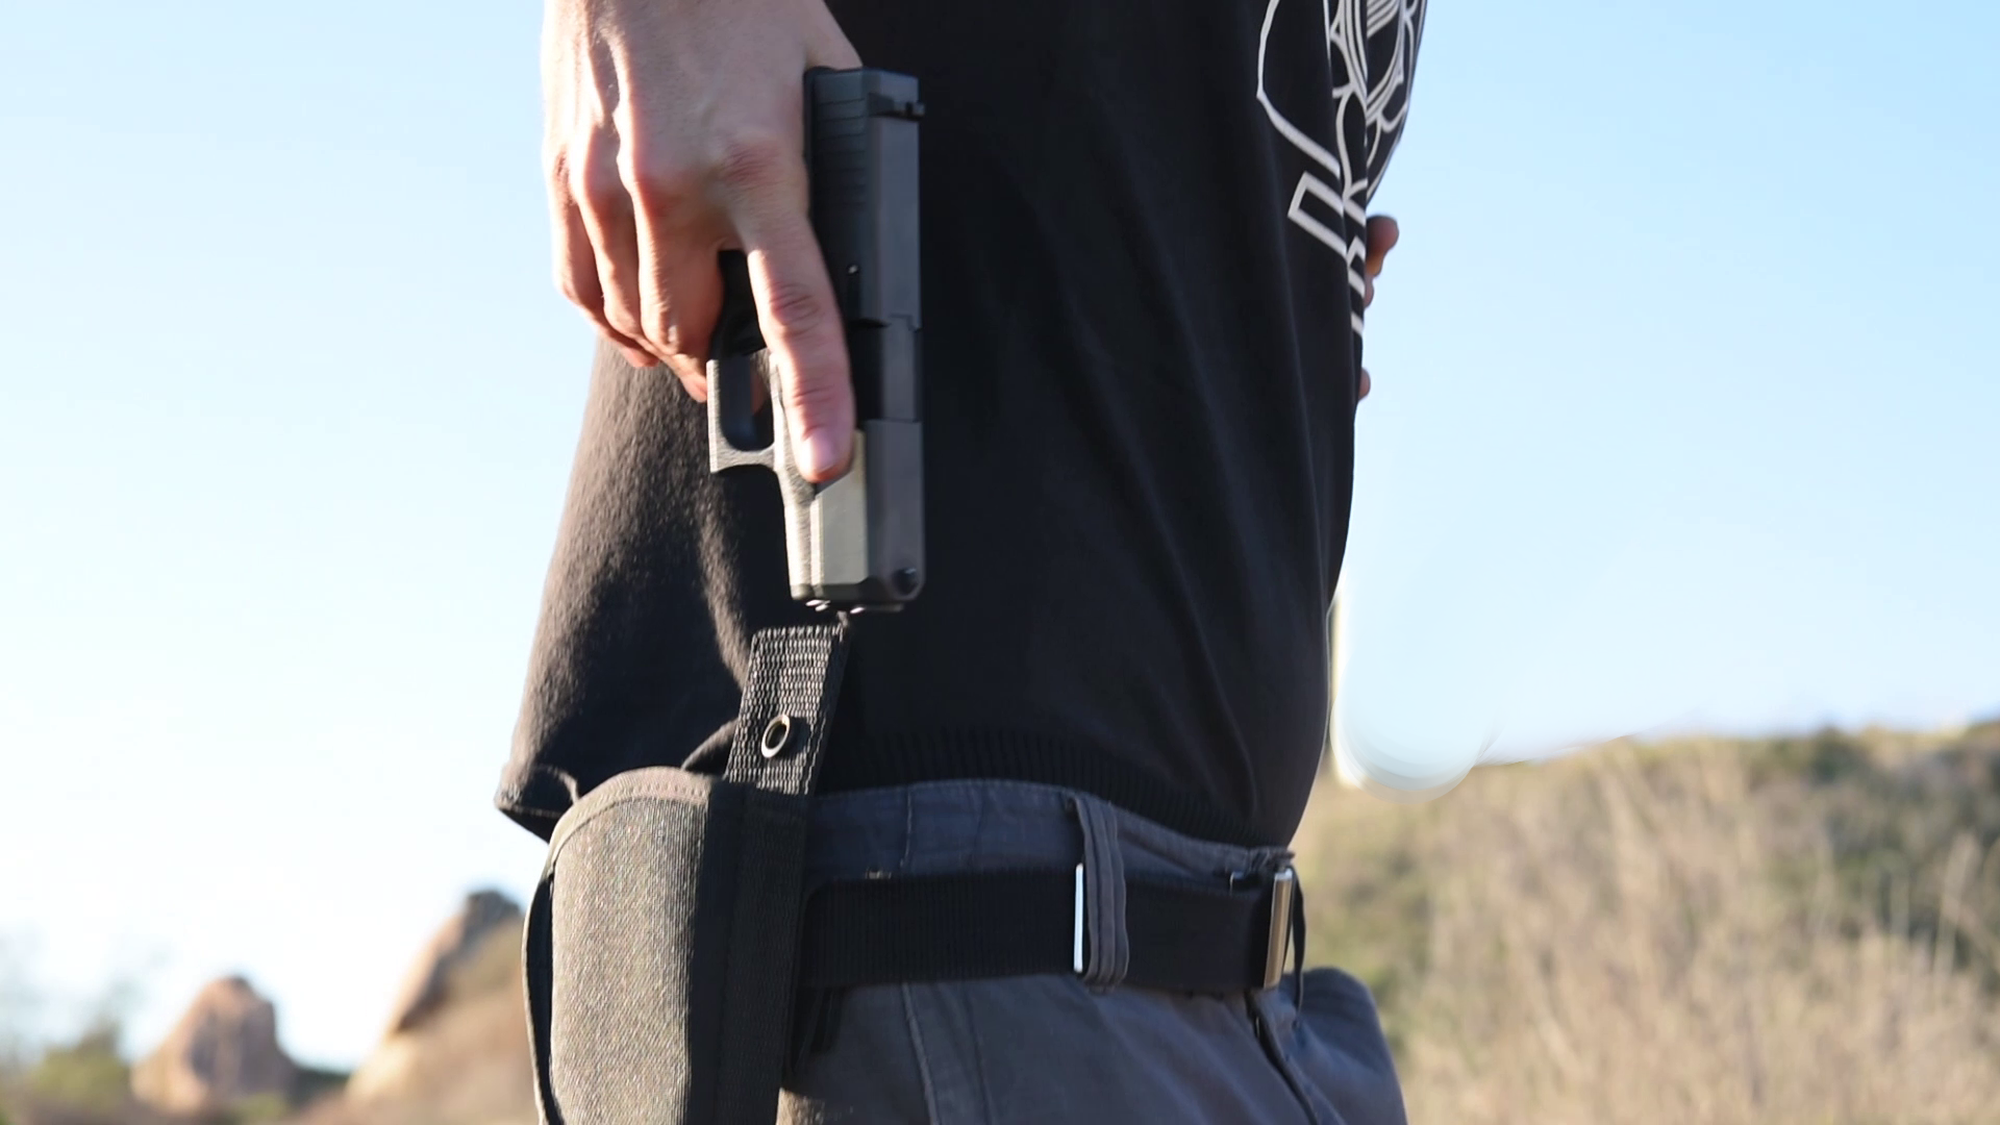
04 Raising Weapon to Shoulder Height While Tilting To Avoid Snags
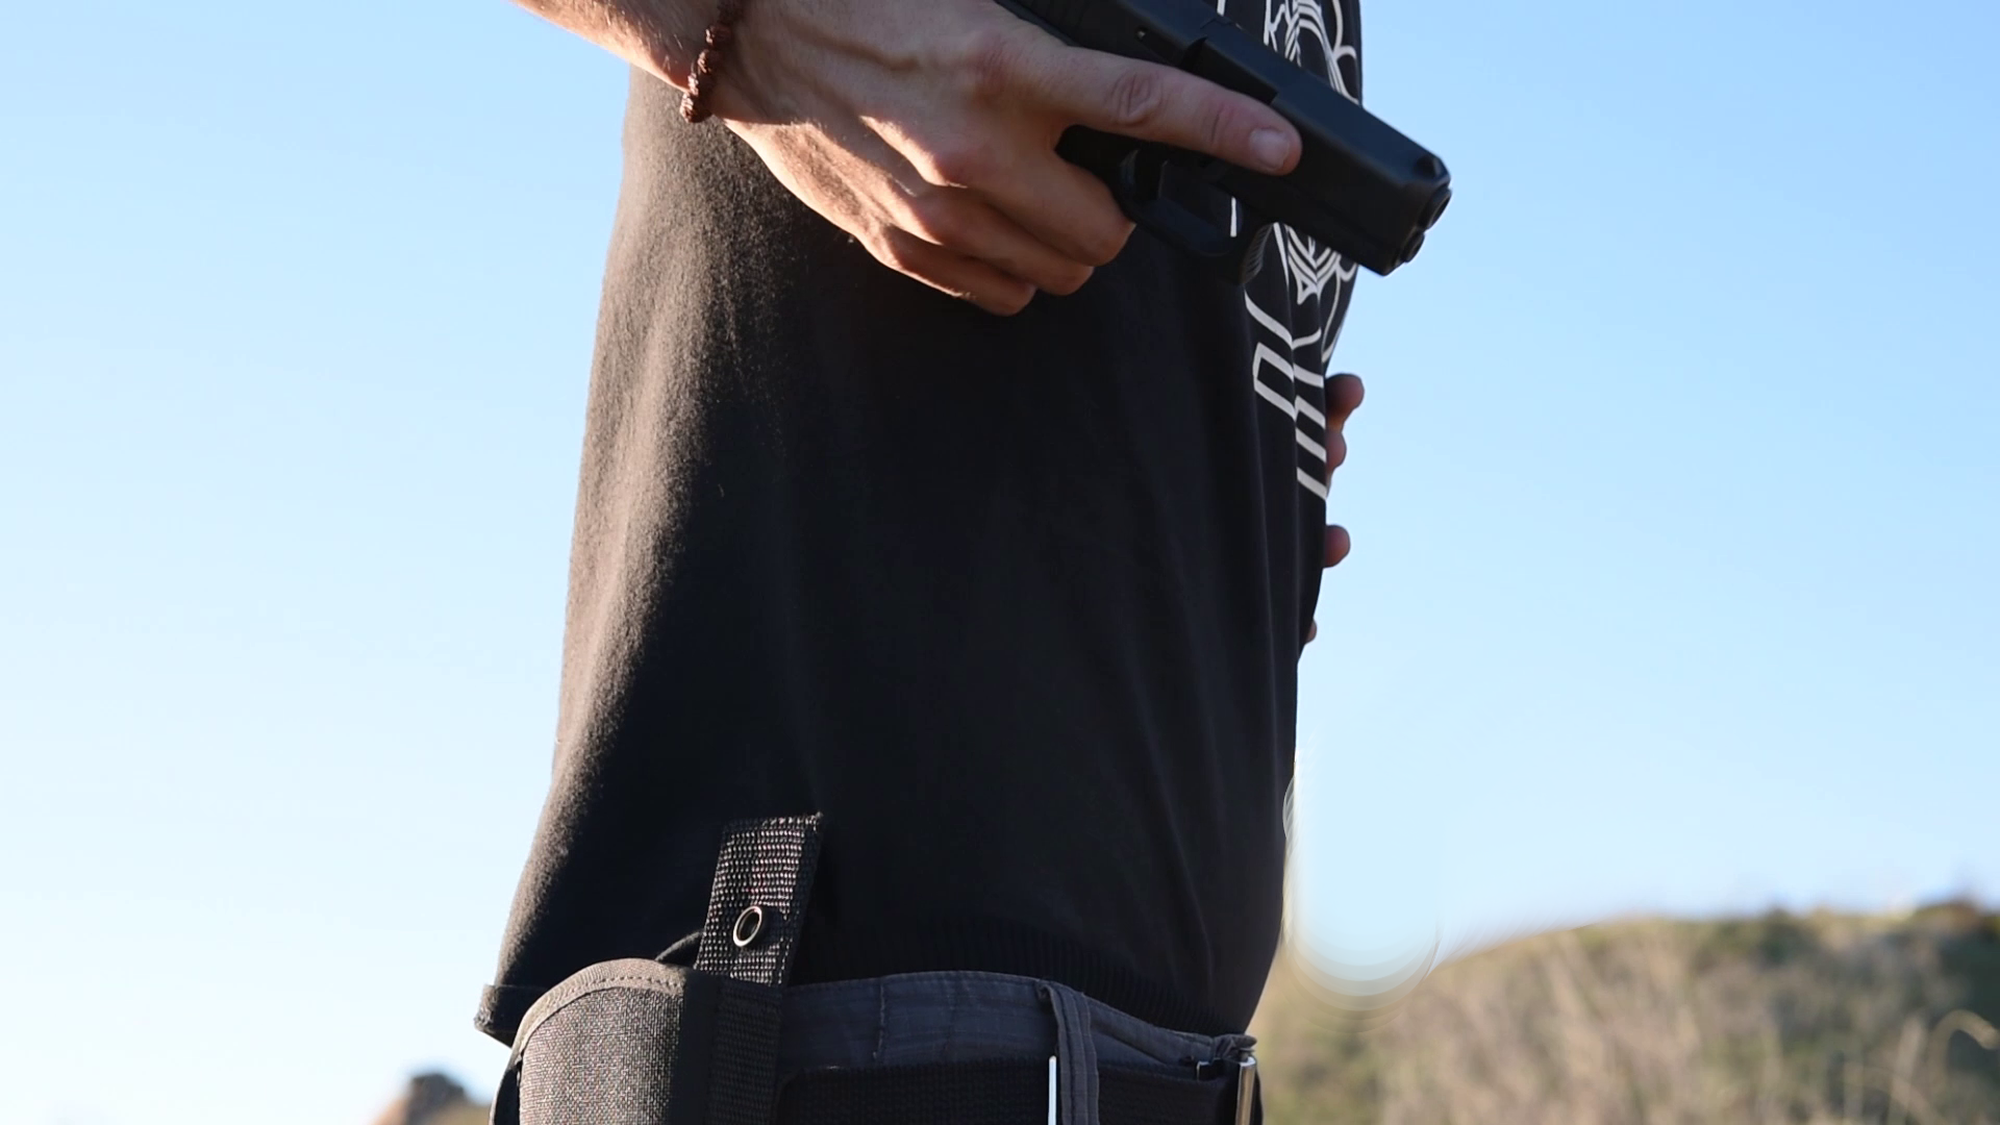
05 Extending to Low Ready Position Where Left Hand Meets Right At Center Point
06 Left Thumb and Fingers Atop Right
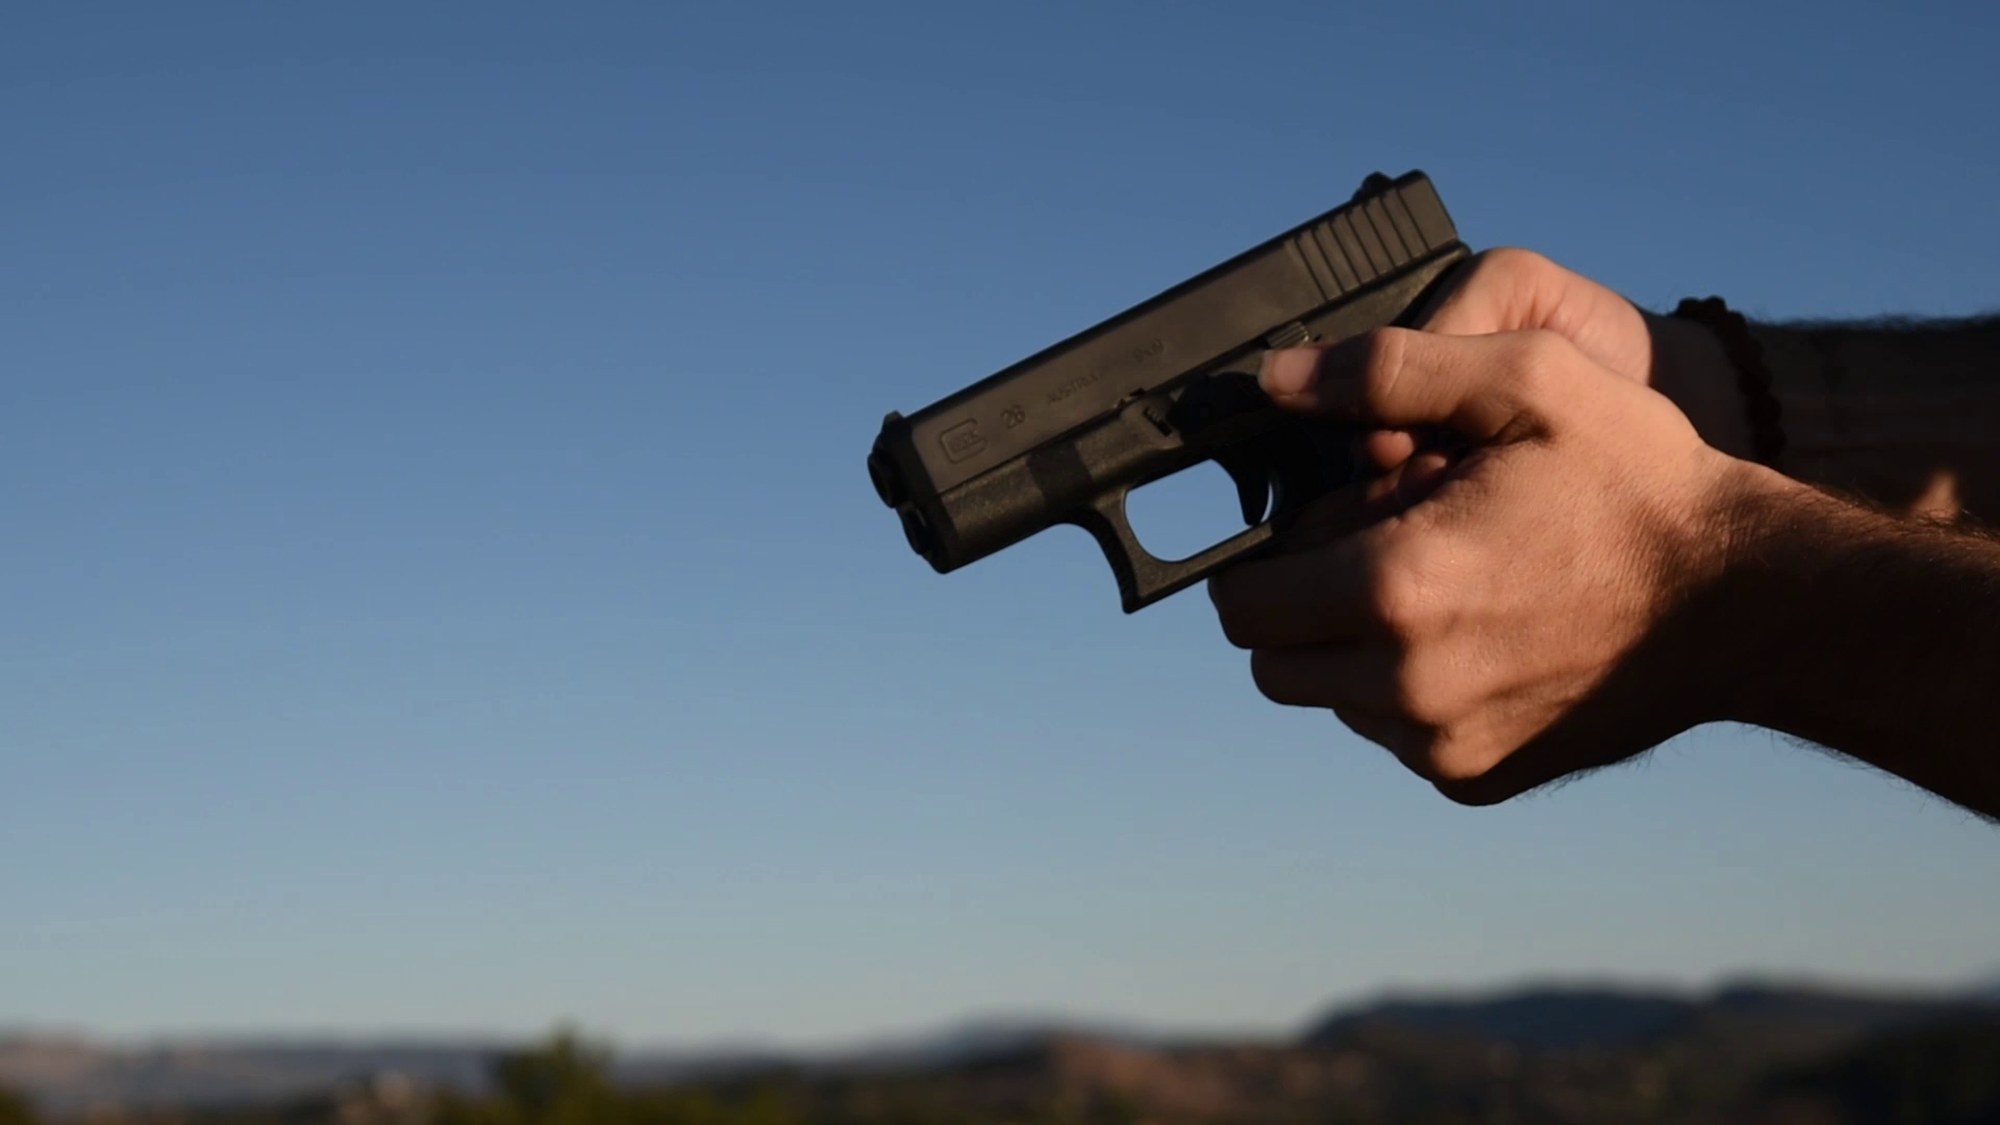
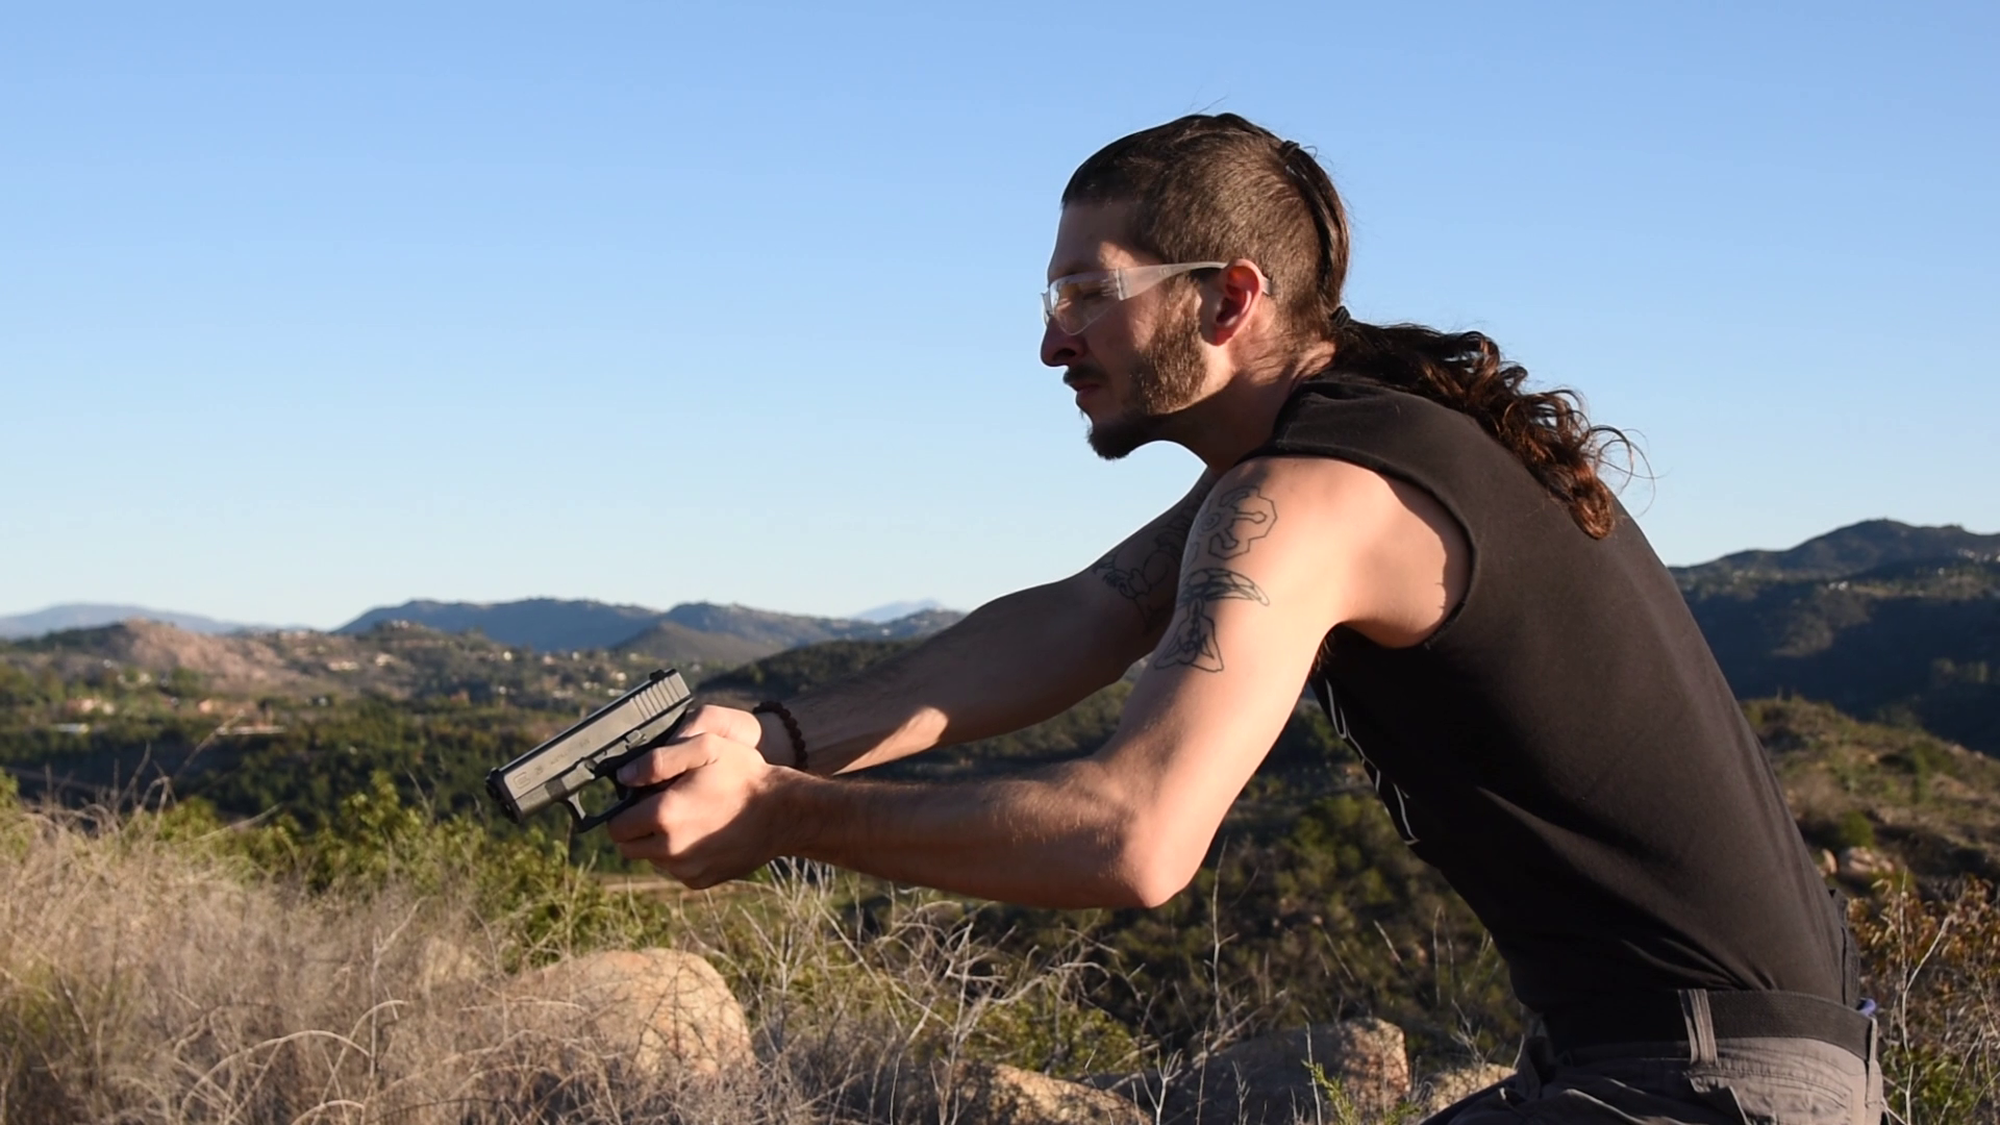
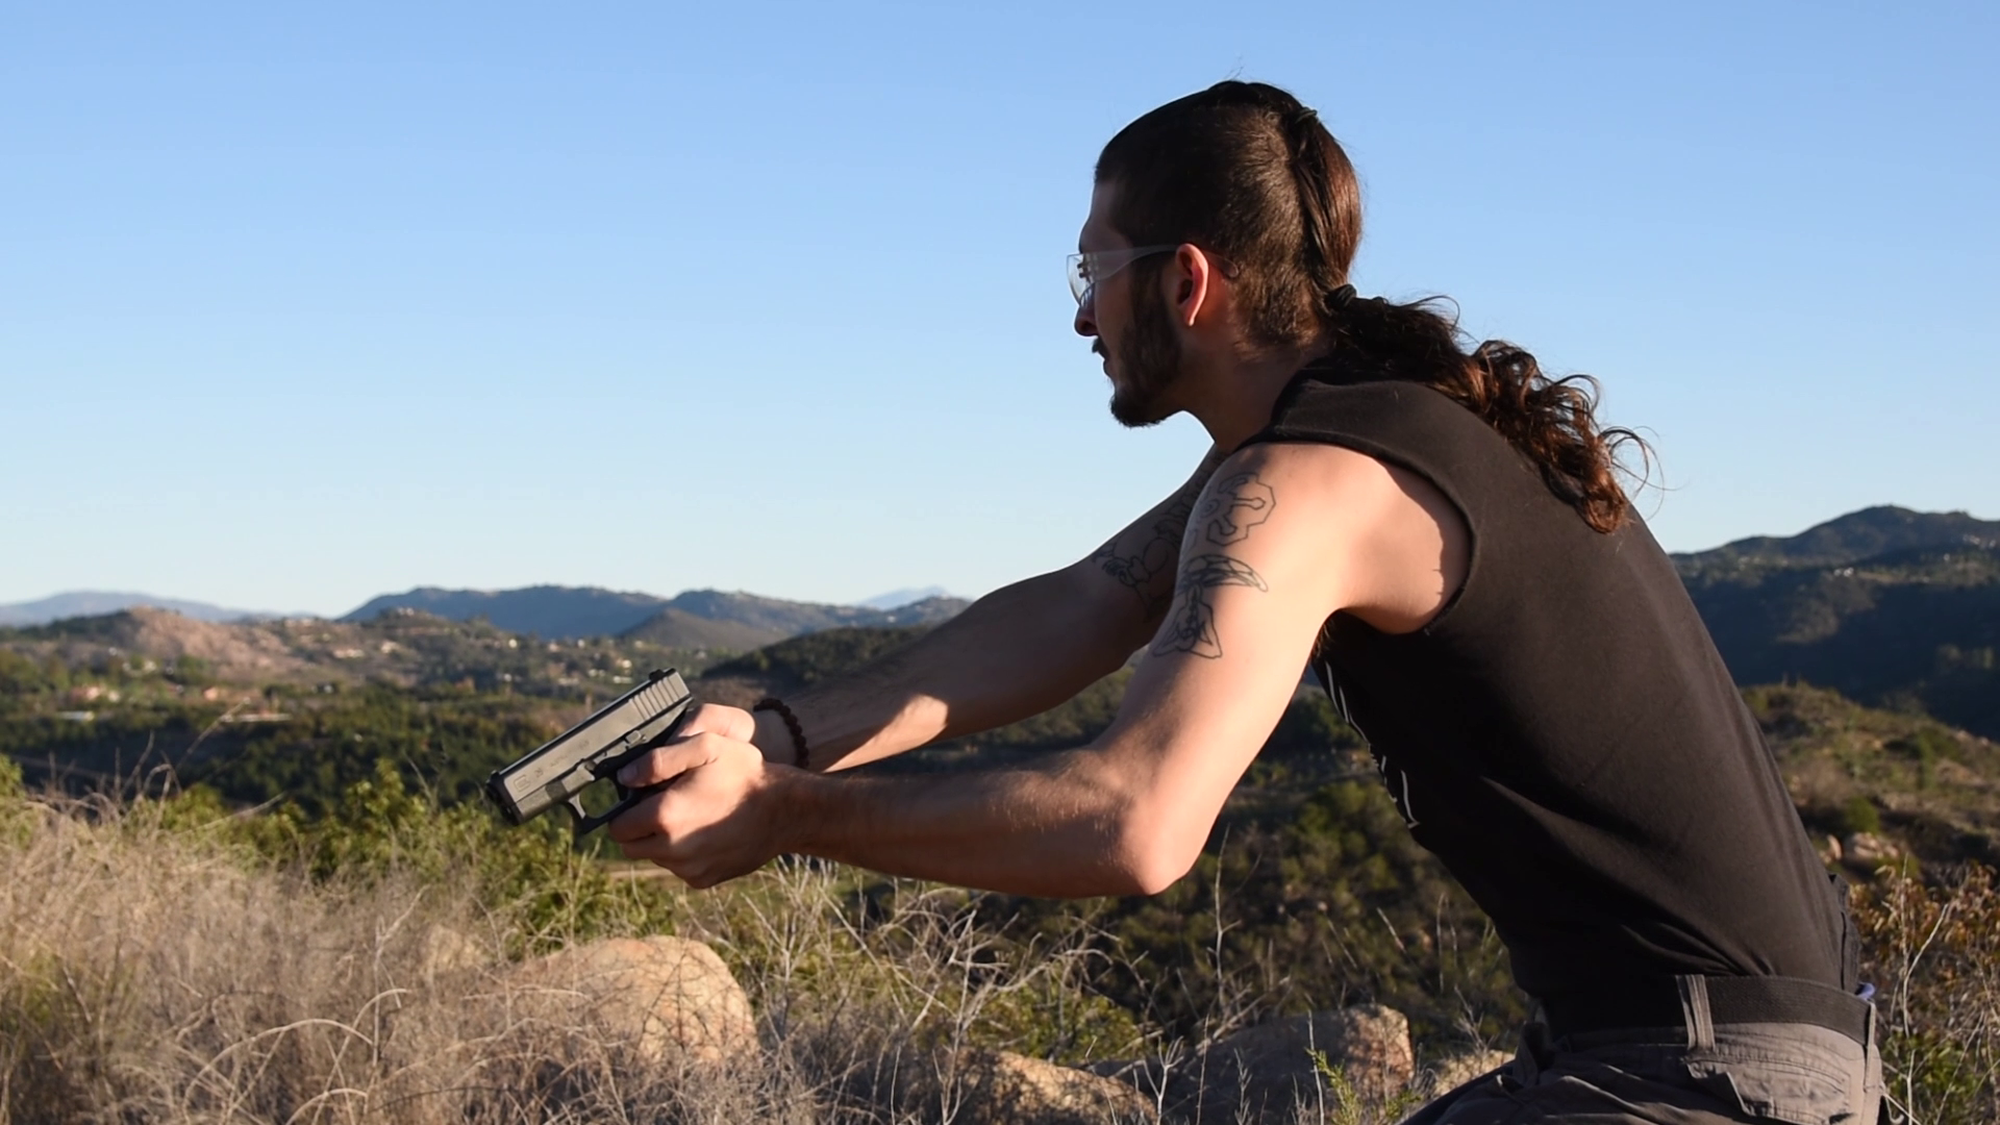
07 Acquiring Target And Taking Aim From High Ready Position Assessing Background
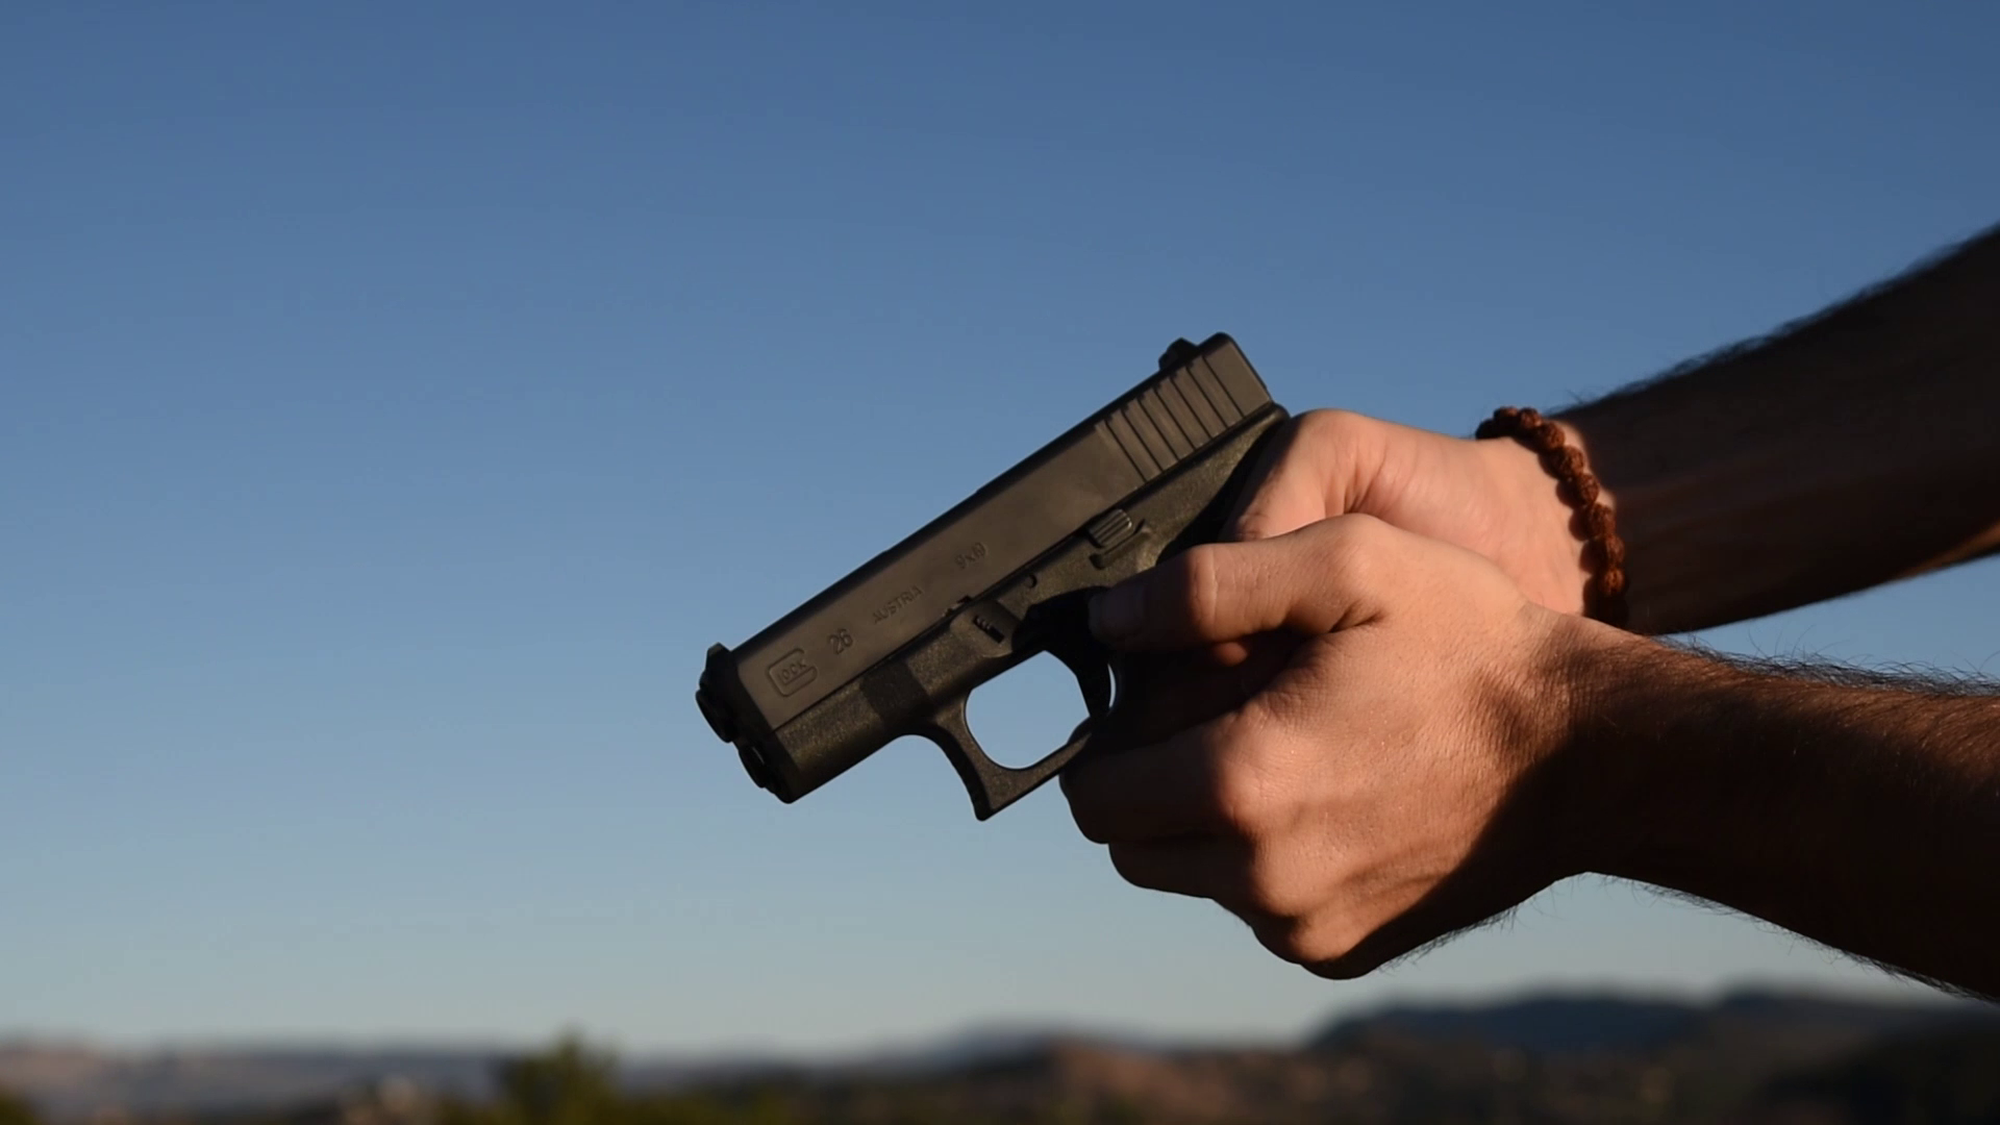
09 Lining Up Sites And Preparing to Fire

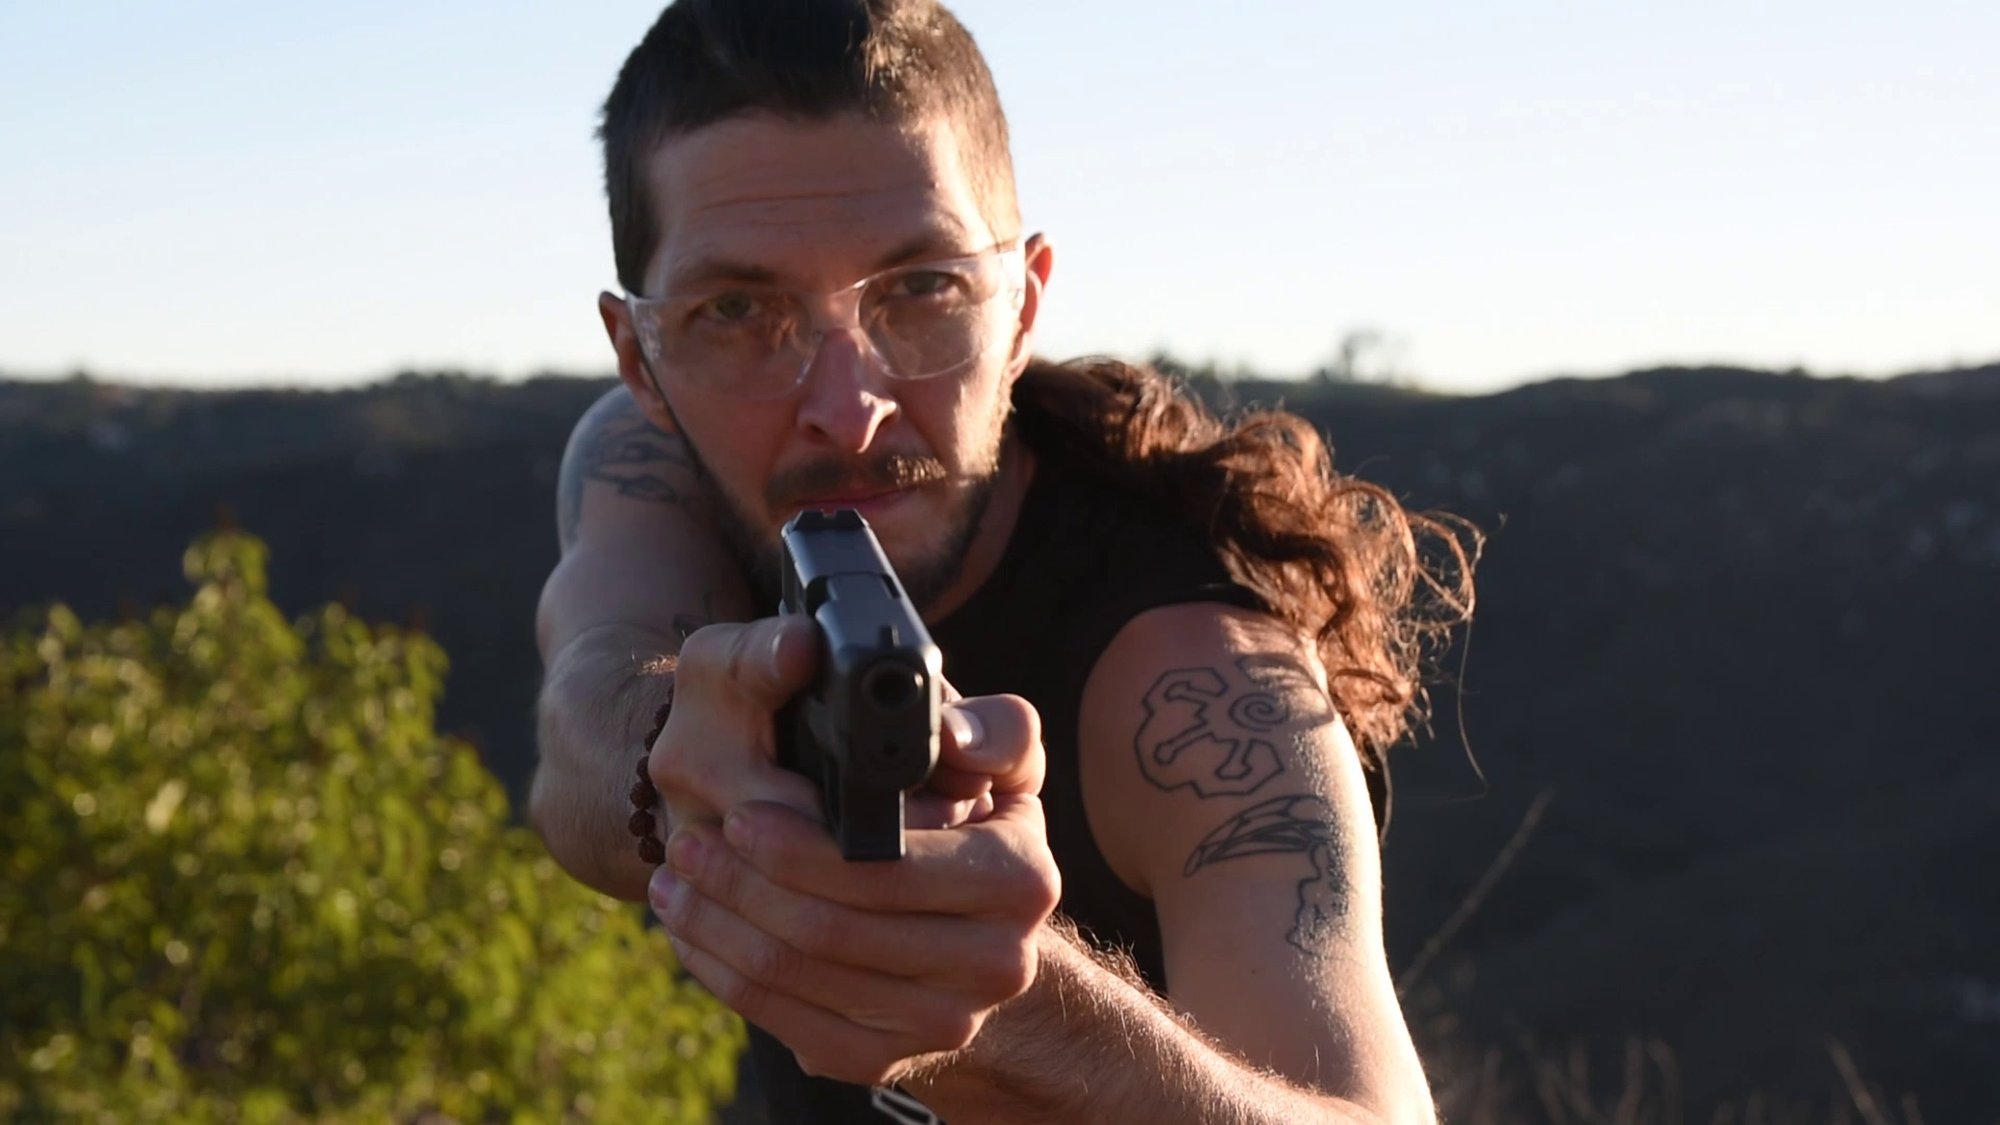
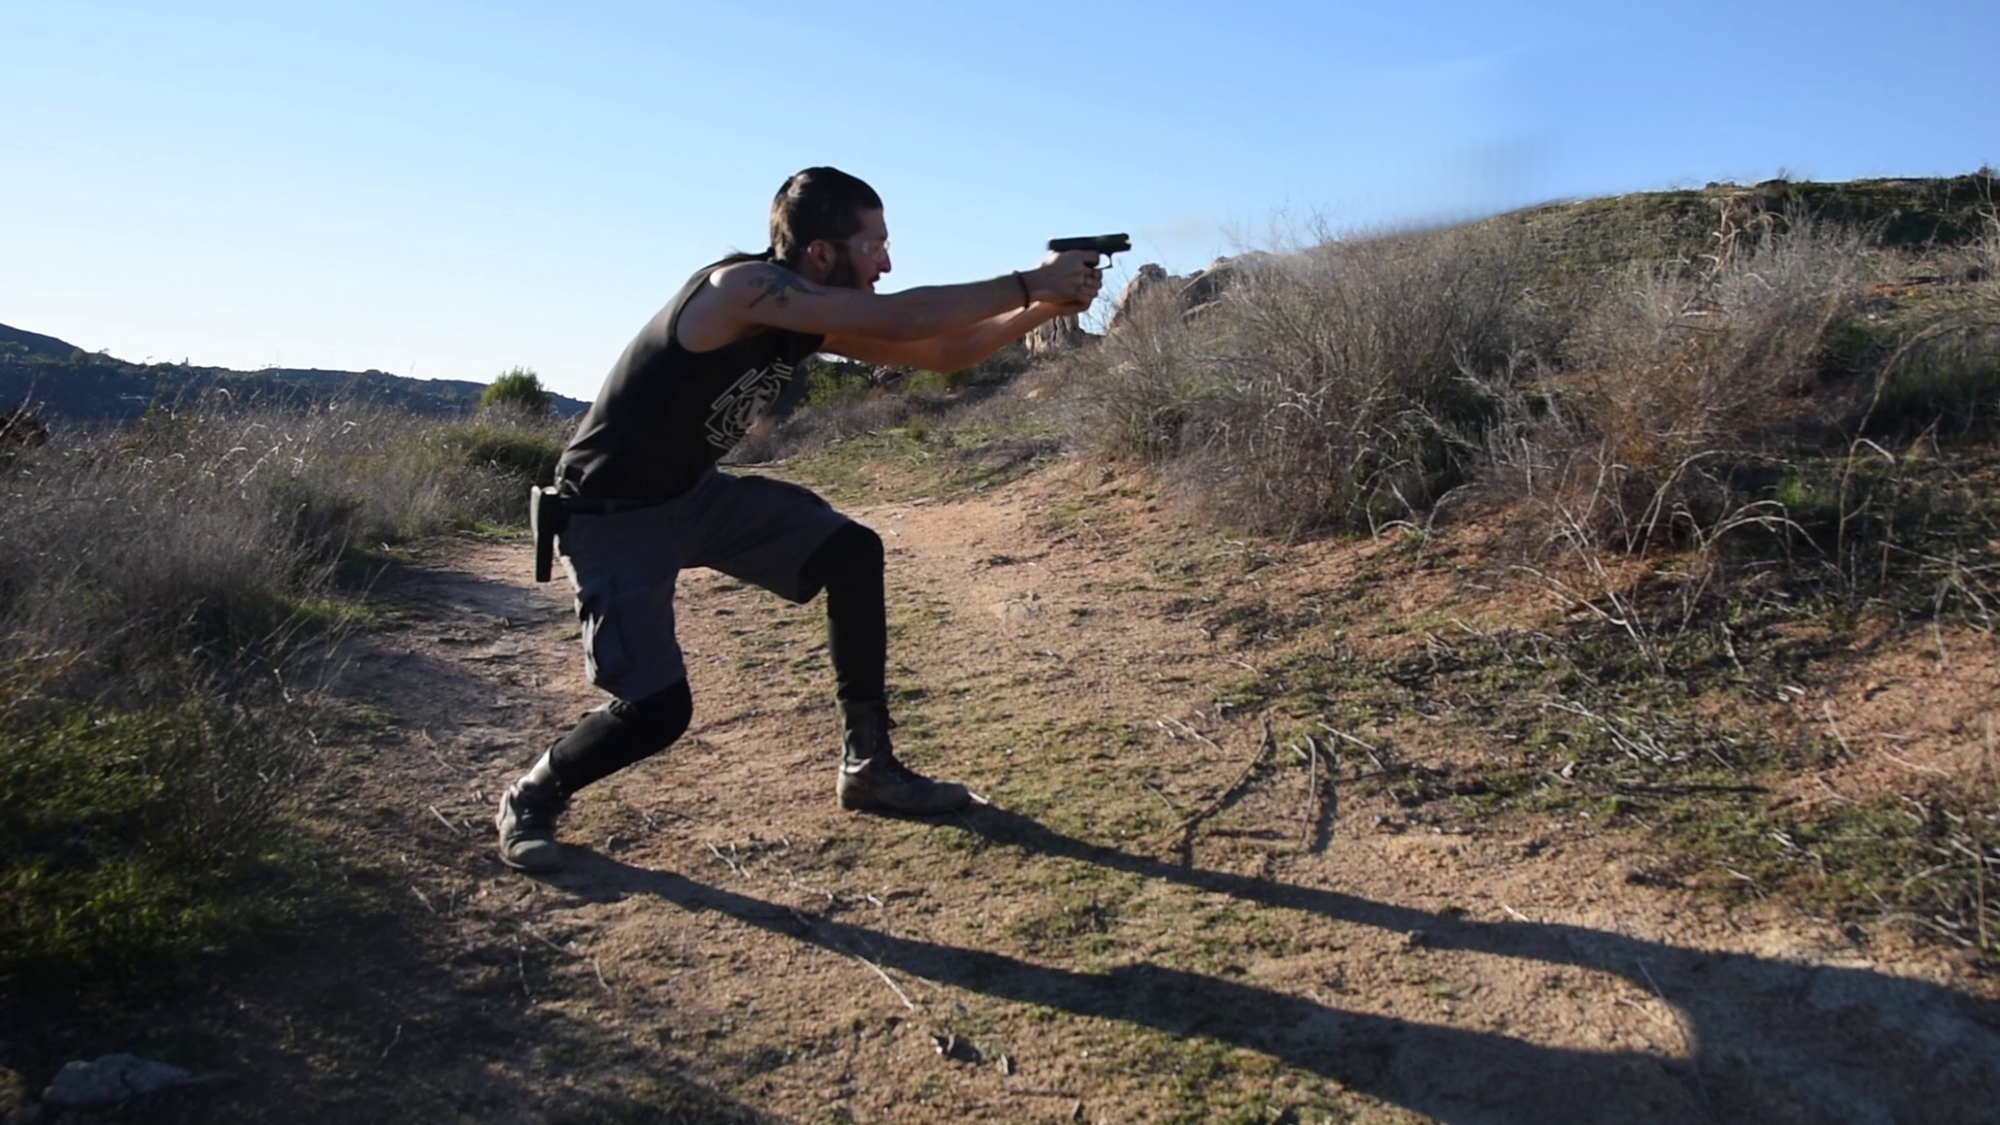
10 Firing At Target 01

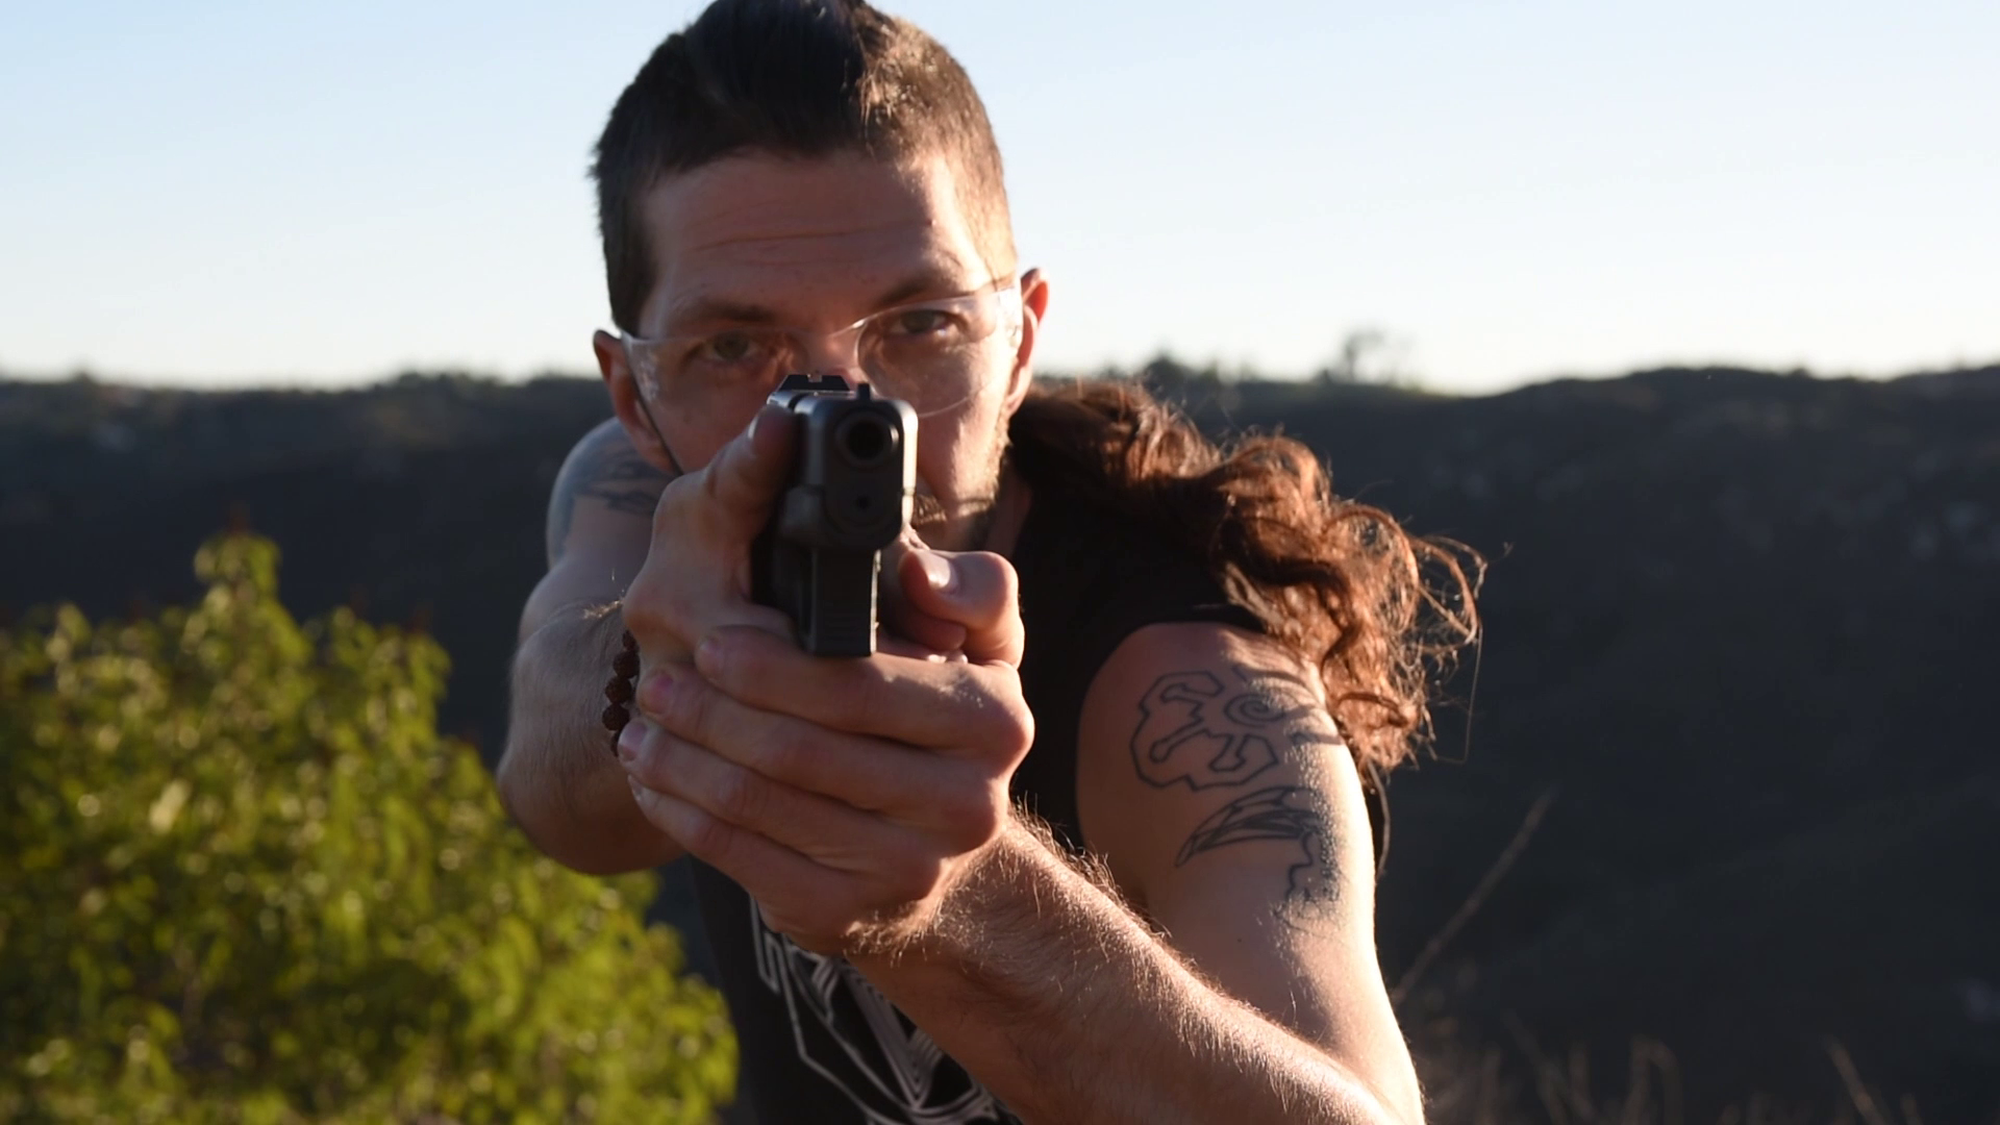
11 Firing At Target 02

12 Firing At Target 04

13 Firing At Target 05
14 Firing At Target 06

15 Firing At Target 07

16 Firing At Target 08

17 Firing At Target 09
18 After Target Elimination Dropping To Low Ready Position
19 Scanning For Additional Threats To The Right
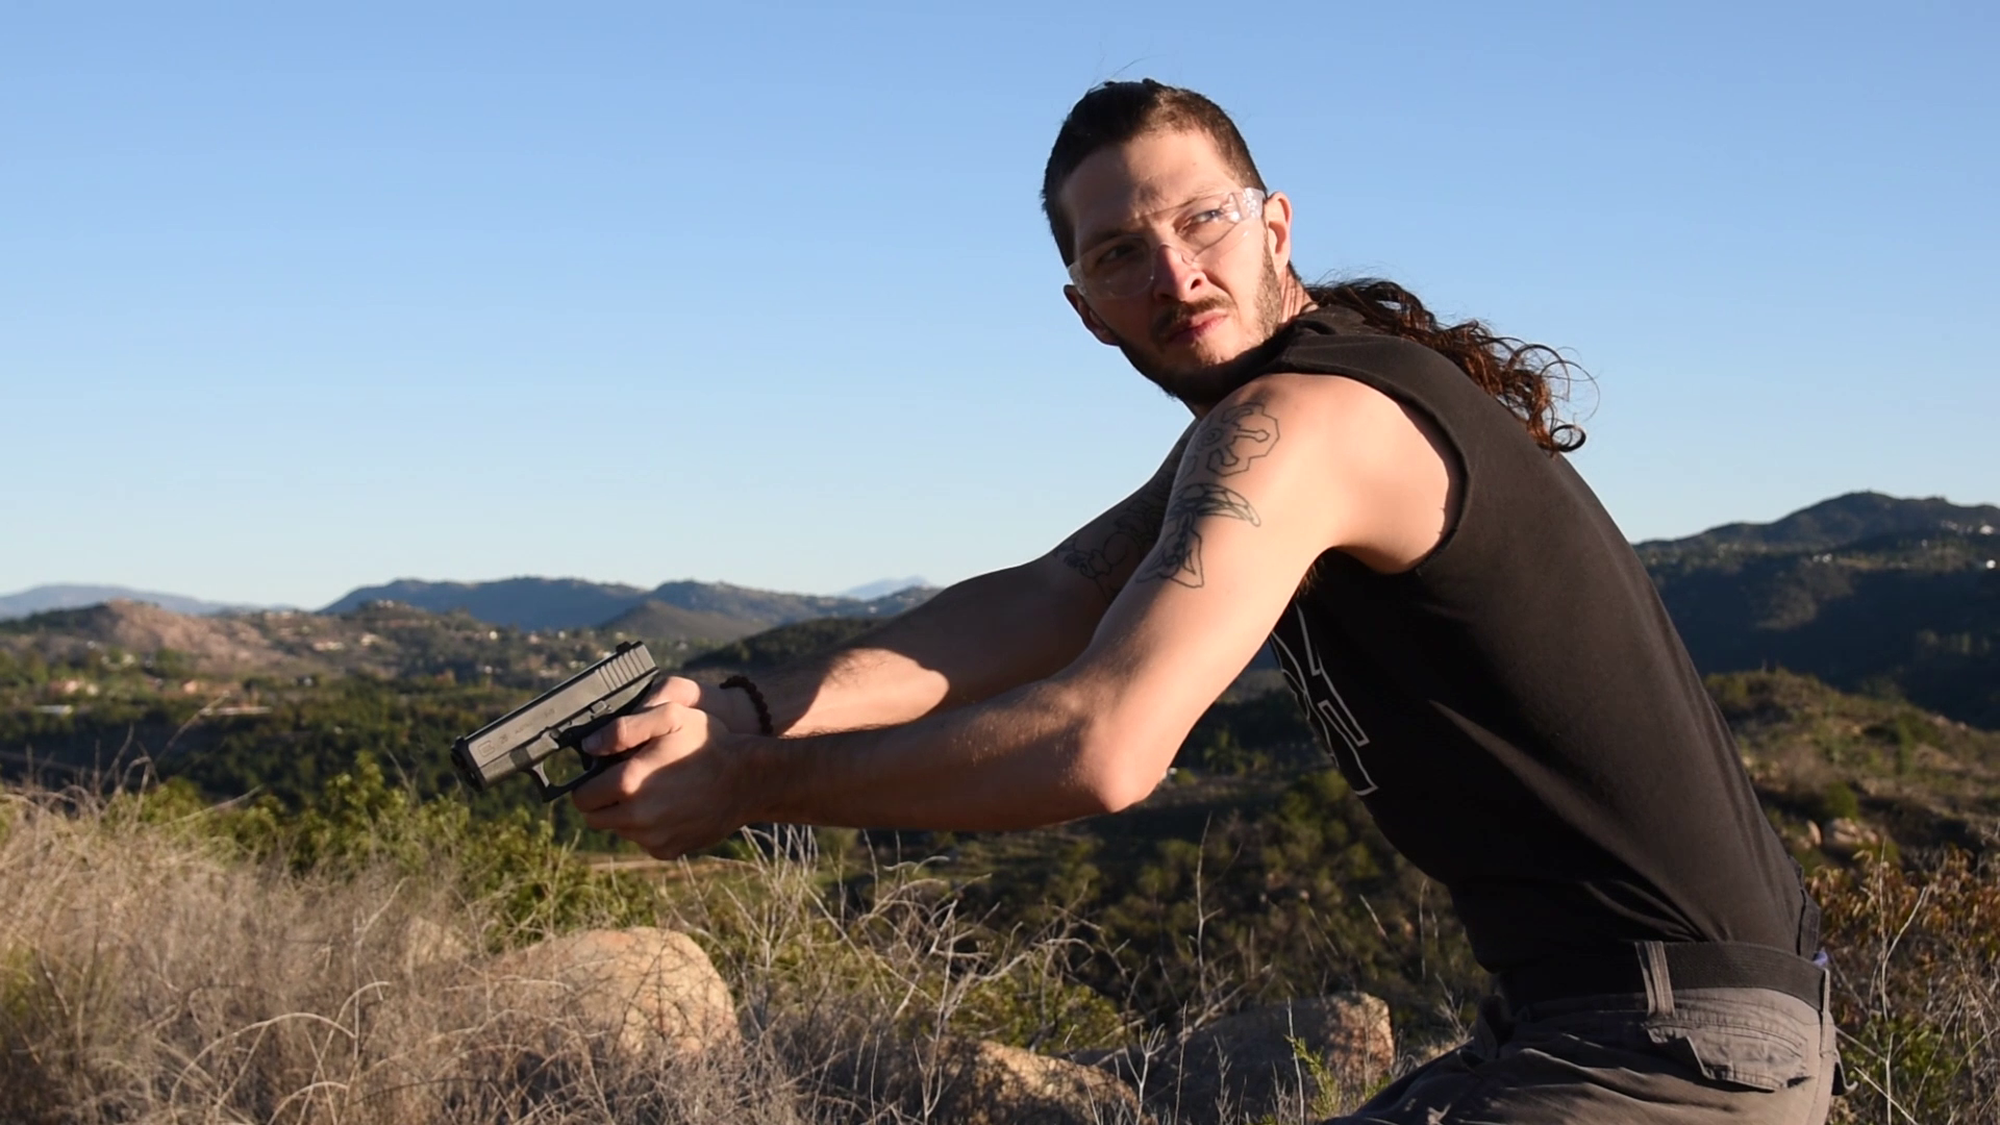
20 Scanning For Additional Threats To The Left
Basic Hand Gun Operation Safety and Training Techniques
Everyone's fire arm safety training is different, some teaching principles are complimentary with others, some are not. As with all martial arts, I prefer the approach of Jeet Kune Do, to absorb what is useful and discard the rest. This approach allows me to keep an open mind and continually evolve and learn. I don't impose my views of the "best" way to teach or train firearm safety, and I don't have any dogmatic loyalties to any one path. What I'm sharing here is the best of what I've learned along the way. I'm not a military combat veteran, law enforcement officer, or violent criminal. To this day I've never shot anyone and have lived a lifestyle of strategic peaceful avoidance of most forms of violence. I can't speak from experiences of gun fighting, I can only at this time speak to how I've been trained. I've been trained by military gun fighters, international private security contractors, and civilians alike. As a private citizen who seeks only to be prepared to use lethal force in self-defense in accordance with the law, it's my right and arguably my responsibility to be trained on firearm safety protocols.
So far what I've learned has been that no matter what you're relationship to firearms, the 4 rules of firearm safety should be observed at all times:
1. All guns should be assumed to be loaded.
2. Never point the muzzle at anything you don't intend to destroy.
3. Keep your finger out of the trigger guard until you've acquired your target and have decided to fire.
4. Be certain of your target, and be aware of what's behind it.
These rules may be written differently but should convey the same concepts. These were drilled into me when I was in a state where you had to take a test by a certified instructor to apply for a concealed carry permit. After a bit of experience training on the range, I was introduced to another rule which may be considered optional depending on who you ask. In my professional training, I was taught to chamber a round and re-holster the weapon before taking my turn to fire. I was taught to do this in a very safe manner, but when I was training with a different group of folks, they noticed this practice and asked me if I meant to do this. I replied that I was trained this way. They weren't shocked, they just shook their heads and respectfully suggested I reconsider, why take the chance they asked. They were not trying to assert superior knowledge or truth, they just wanted me to consider that it might be wise to wait until you're up at the line, or the table, or whatever the firing point is, to chamber. That way when training with other people, there's almost no chance anyone, including myself could be injured. It wasn’t a rule per se, it was just a preference of theirs that I immediately resonated with and agreed to. Some would say, part of training is to be confident in chambering a round and leaving it there, at all times holstered or not. I'd say, I've tried both ways, and I feel better about staying unchambered until I'm certain everyone else is behind me and that I'm fully focused with no distraction on being the one to fire. This of course makes sense only if you're taking turns one at a time, if there are multiple people firing at will at the range, the same principle could be applied, basically that until you're pointed in the direction of the target and ready to start firing, consider the safety advantage of waiting to chamber.
This debate extends to concealed carry, open carry, and all other contexts out in the real world. Some people prefer to stay chambered at all times, which has it's pros and cons from a tactical perspective. Those seconds to chamber a round can definitely determine life and death in certain situations. I've been in situations where in a heightened state of alert of imminent danger I've chambered a round, and allowed it to remain in place while I assessed the situation and until I was confident the potential threat had passed.
To me the practical principle is, if at all possible, consider giving yourself time to decide to chamber around, but don't hesitate to proactively do so if on high alert. Though once a round is chambered, don't forget about, and take responsibility for the fact that it's there until it's not, whether by cycling the action to clear the round without firing, or by firing until the magazine is empty and the weapon is in a state indicating there are no more rounds. These are just my own protocols, as always consult your lawyer, tactical trainer, family, etc. to develop your own strategies. This is food for thought. Had I not had a diversity of training partners, I'd not have come to this personal compromise and synthesis of opposing view points. I feel my safety and that of others is enhanced by having an open mind.
With that established, I'll share the procedure that I was taught which I've adhered to since my first training. Assuming you’re right handed, and drawing from a side holster on the belt or outer hip, the bullet points would be:
1. Right hand grips the weapon with the thumb and all other 4 fingers pointing toward the ground while the left hand is simultaneous placed on the lower left ribs (to ensure with muscle memory that your left hand is not in the line of fire).
2. Right hand draws the weapon up and out of the holster, with the index finger pointed straight out of and along side the trigger guard, while the remaining three fingers make a firm grip on the handle below the trigger guard. The weapon then rests at the height of the should with a slight tilt outwards to ensure it is not caught on clothing, hair, etc., should you need to fire before aiming. The left hand remains in place on the lower left ribs.
3. Left and right hands and arms extend towards the center line in the middle of the torso with the weapon pointing toward the ground at a safe point with adequate distance between your feet and the target. Left thumb crosses and lays over right thumb, the other left fingers wrap around in front of the right fingers below the trigger guard squarely without sliding below, avoiding placing the palm of the left hand directly under the weapon.
4. Use the siting set up that is in place to acquire the target, make a clear determination of safety of the background, and then and only then enter the trigger guard with the right index finger and fire with best efforts to hit the center of mass of the target.
5. Once the threat has been eliminated (within the context of legal proportionality of use of lethal force, lower the weapon back to the angle pointing safely at the ground, removing the right index finger from the trigger guard.
6. Turn your head slowing from side to side, as far back as necessary given the surroundings to ensure there are no additional threats, if there are re-engaged as needed, if not:
7. Return to the position of number two above by maintaining the low angle of the muzzle, returning the weapon in a tilted position at rest near the right shoulder, left hand back on the lower ribs.
8. Use the right index finger to tap the slide of the weapon a few times to establish the habit and muscle memory that you can trust yourself to then re-holster the weapon with full confidence that you do not have your finger on the trigger guard which could result in an accidental discharge.
This is my personal adaptation of what I've learned. It's by no means a exact replication of the steps and words used, it's become my way of articulating the training cycle. What this leaves out however is the consideration of reloading under stress, clearing jams, extracting a chambered round after the incident is over, whether in training or in a gun fight, etc. There are many other considerations beyond the scope of this basic overview. There is often debate about how many rounds to fire, at what speed and cadence, the exact angle of the "ready position" and "low ready position", the posture of the "duck walk", the need for training while moving and communicating, the need to train from various awkward and un-squared off angles and positions, etc. I would consider many of these skills to be advanced and require professional mentorship and oversight to ensure maximum safety.
Firing in a straight line, at a target straight ahead, at the same height and same angle may be good for sporting competition, but it's not adequate for the real world. The need to be very versatile, mobile, agile, fit, flexible, nimble, coordinated, balanced, to be able to find "cover and concealment", and many other skills and forms of conditioning are needed.
After my initial training on the range, I felt it to be wise, as well as my responsibility to purchase an air soft replica of the Glock 19 I was trained on. I spent many hours getting comfortable with the training cycle in a very safe manner. I feel it's advisable to train as much as possible with non-lethal training weapon systems that have as much similarity to the size, weight, action, and feel of the lethal weapons you own. It would preferable to have a one-to-one ratio of training to real weapons, that way you're not limited to the budget of expensive live rounds at the range, and you can more safely do dynamic forms of training beyond standing still in one place.
I personally have never had the time or budget to make a lot of what some trainers call "expensive noise" on the range. Therefore air soft replicas are a great affordable solution. Even more affordable are the ever-reliable, yet not quite as realistic pellet or bb air, c02 or spring powered guns. As with anything, I prefer the least toxic and most environmentally friendly options. Some day I hope to develop fire arm training weapons that are able to fire viable seeds and seed balls so that the tactical permaculture mythos can really come to life. Furthermore, in force-on-force training drills, (with proper safety equipment from head to toe of course), you would know where not to stand as the kill zones would be defined by where the most daisies were growing!